Network Backups via Rsync and Rsnapshot

Network Backups via Rsync and Rsnapshot (via www.jeffskinnerbox.me)
I got a 4 Terabyte Seagate Backup Plus hard drive as a Christmas present and I plan to put it to use as a central backup for my Linux desktop, multiple Raspberry Pi, my laptop, and anything else that my come along. My plan is to keep things simple but I wish to do regular hourly, daily, weekly, and monthly incremental backups. This will give me the ability to recover files from the past, but also to recover from a hardware failure or software install that has gone very badly.

There are many backup tools you can pick from but I wanted to stick with something basic, widely used, and simple. Rsync is one of the most widely used Linux backup solutions, and in fact, it is often used by other backup tools as a foundational component. Rsync stands for remote synchronization tool. Rsync is a UN*X command line utility, containing a special protocal and algorithm, that synchronizes files and directories from one location to another while minimizing data transfer by using fast incremental file transfers. (rsync has also been ported to Microsoft Windows, Mac, and other operating systems.) The first time, rsync sends all the data over the network to your backup machine. The benefit comes the next time you backup………

(more…)

Having Fun with Wine, VirtualBox, and TurboTax

Having Fun with Wine, VirtualBox, and TurboTax (via www.jeffskinnerbox.me)

Sometime ago, I committed myself to Linux and Wine, with the promise that I would sincerely abandon Microsoft Windows by notdual booting my system nor installing any virtualization software. Well, it is now tax-time and the Federial goverment wants their “fair share” of my income. Will my prefered tax software package, TurboTax, run with Linux & Wine? All the evidence I have gathered (see Wine’s ratings for one data point) on the web leads me to believe I will be very disapointed. I can’t find any success stories! Never the less, I will use this as a learning opportunity. I’m going to plung forward and try to get TurboTax working with Wine, …. and it it fails me, resort to VirtualBox, which appears to have at least some success stories…..

(more…)

IPython Notebook in Virtualenv

IPython Notebook in Virtualenv (via www.jeffskinnerbox.me)
I discovered a problem with using nbconvert for posting IPython Notebooks to my blog. Basically it doesn’t work for my version of IPython, so I looked for an upgrade. I found it but its only delivered bundled with the latest version of IPython. Currently, I’m stuck with using IPython 0.13.2 on my Ubuntu system, at least if I use the distribution provide via Ubuntu. And I can only expect to have problems if I try mixing an older version of IPython with the latest version of nbconvert.

I sure Ubuntu will be getting around to supporting the latest version of IPython (i.e. IPython 1.1.0). in the next few weeks to months, but that doesn’t help me now. I’m hesitant to do a whole sale upgrade of IPython on my system since it my upset other thing I got going on.

The answer to my dilemma will be using the Python Org tool virtualenv (see this for full documentation). This tool will give me a virtual environment that will not disrupt my other projects. Virtualenv is a tool to create isolated Python environments, quite likechroot jail on Unix systems. In a chroot, programs cannot access anything outside of chroot but in virtualenv as the name implies, it creates isolated environments only with respect to libraries, but the programs can still access the files and folders normally. With this, I can support my blog IPython 1.1.0 while also maintaining my other projects which requires IPython 0.13.2……

(more…)

I’m Moving so I can Blog with IPython Notebook

I have moved to http://www.jeffskinnerbox.me To gain a deeper understanding of the GNU Radio software, I want to rebuild some skills & insights in digital signal processing.  But before I take on this topic, I want to refresh my signals & systems skills I learned long ago while in college.  I have chosen Mark Wickert’s … Continue reading

Building My Linux Box…The Implementation

Ubuntu 13.04 Raring Ringtail
In an earlier post, I outlined my plan for building a Linux Box.  Here I will post how that plan was ultimately implemented. Life has taught me that all good planning is ultimately undone, and at some point, you must improvise.  That has also proven true for this quest to up grade my computation.  Specifically:

    • After ordering all the hardware, it came to me that it was dumb to attempt to reuse my old semi-reliable, slow CD drive.  So I purchase the HP 24X Multiformat DVD/CD Writer (dvd1260i) at Best Buy for $40.
    • I discovered that the my old PC had ATA hard drives (commonly called an IDE drive) and my new Mobo only supports SATA (SATA 3Gb/s & 6GB/s and it includes an external eSATA port).   This blows my plan to reuse my existing hard drives … stupid me, I should have checked.  I did a quick scan for ATA controller cards and found a few (not many) for $15 to $30.  I could buy the card and make this work but it doesn’t seem like a good investment.  The drives are 400G drives and has a maximum data transfer rate of about 133MB/s (i.e. ATA/66).  The maximum data transfer rates of SATA II and SATA III are 300 MB/s and 600 MB/s, respectively.  I can buy a Seagate – Barracuda 500GB SATA II Internal Hard Drive for $70.  Given my objective to increase the performance of my computing experience, buying a new SATA III hard drive should have been part of the original plan.
    • After reading up on RAID and the Intel Rapid Storage Technology (RST), I concluded that it would be best to do a Software Raid and not use RST.
    • While I assumed in my original plan that I would dual boot the box with Linux and MS Windows, the comment from armahillo convinced me of what I suspected I should do; and that was to make winemono, and PlayOnLinux work for me.  While I haven’t stressed them, so far so good.  I have not installed VirtualBox and I suspect I will not … unless I get desperate.
    • I was planning to reuse my old keyboard and mouse, but you know, I hated that keyboard and the mouse was already acting badly and about to die on me.  So I ended up replacing them with sometime worthy of my new system.

Configuring Ubuntu

You’ll find many recommendations on how to jazz up a newlly install Ubuntu system.  I found some of these suggestions useful:

Installing “dot” Files

Like may, over the years I have made a large time investment in tuning my .bashrc, .vimrc, and other such resource files.  I installed my beloved “dot” files from my Git repository.

Installing Google Chrome’s Native PDF Reader in Chromium

Chromium is a fully open-source version of Google’s Chrome, and for licensing reasons, it doesn’t come packaged with the integrated Flash or a native PDF reader.  Lucky, there is a work around and that is documented here: Use Google Chrome’s Native PDF reader in Chromium.

Installing My Squeeze Box

I have a SqueezeBox device in my workshop for playing music.  On my old PC, I had installed the SlimServer which would provide the music stream.  I want to now reestablish that capability on the Linux box. The post How to Use Squeezebox With Ubuntu and the Logitech SqueezeBox Wiki gives you all the information you should need.

The Ubuntu (Debian) software for the SqueezeCenter or now called the Logitech Media Server (formerly known as SlimServer) is maintained by Logitech, and therefore, will not be installed via get-apt.  To make it part of the package resource list (used to locate archives of the package distribution system in use on the system), you need to update the sources.list file.  To do this, do the following:

sudo vim /etc/apt/sources.list

Scroll to the bottom of the file and enter the following information and then save:

## This software is not part of Ubuntu, but is offered by Logitech for the Logitech Media Server (formerly known as SqueezeCenter or SlimServer).
deb http://debian.slimdevices.com stable main

Now do the following:

sudo apt-get remove --purge logitechmediaserver
sudo apt-get update
sudo apt-get install logitechmediaserver

Now open a browser and type “http://desktop:9000” as the URL, where “desktop” is the name of your Linux system.  This brings you to a Squeezebox interface to configure the system.

If you want to start/stop Logitech Media Server manually you can run:

sudo /etc/init.d/logitechmediaserver stop
and
sudo /etc/init.d/logitechmediaserver start

Setting-Up Harmony Remote

I have the Logitech Harmony 650 Universal Remote Control for my home theater system.  To program the device, it must be tethered to a web site via a Windows or Mac PC.  The Harmony web site does reference some Linux support done by others.  The posting “How to set up a Harmony remote using Linux” and “Logitech Harmony Universal Remote Linux Software Support” give you the basics of what you need to do.  Within these sites you lean about the utilities concordance and congruity. The first utility provides most of the functionality of the Windows software provided by Logitech and the second is a GUI application for programming Logitech Harmony remote using concordance.  To install these utilities, do the following:

sudo apt-get install concordance
sudo apt-get install congruity

You also have to configure the web browser to ask what to do with download links. It is best to use Firefox and you can configure downloads via: Edit->Preferences->General->Downloads->Always ask me where to save files.

Now plug the remote into the PC using the provided cable, and enter the command: sudo concordance -i -v.  You should get a bunch of data and the word “Success”, verifying that you can talk to the device.

Now go through the following process:

    1. Plug in the remote via the provided USB cable.
    2. Visit the Harmony Remote’s member site URL.  This appears to be a legacy support site and Logitech site listed in the documentation with the device will not work under Linux.
    3. Create an account or login into your existing account.
    4. Skip/ignore the “you need to update your software” steps, and eventually a download prompt appears.
    5. Choosing ‘open’ rather than ‘save’ impressively results in the Congruity graphical setup up launching.
    6. Step through the setup boxes as prompted.

Setting-Up Keyboard & Mouse

Logitech Wireless Illuminated Keyboard K800 To improve my driving experience, I purchased the
Logitech Wireless Illuminated Keyboard K800and the Logitech M510 Wireless MouseLogitech M510 Wireless Mouse.  These devices use the Logitech Unifying wireless technology, which allows a single wireless receiver to connect with multiple Unifying devices.  I plugged in the mouse’s receiver  and in short order the mouse was working.  I was a bit concerned about the ability of the receiver to support multiple device (i.e. the keyboard) simultaneously under Linux.  Doing a quick search I found a post discussing how to do the device pairing under Linux.  To install the ltunify pairing software, and do the pairing, do the following:

cd ~/src
git clone https://git.lekensteyn.nl/ltunify.git
cd ltunify
make install-home

To list the devices that are paired: sudo ltunify list
To pair a device: sudo ltunify pair, then turn your wireless device off and on to start pairing.
To unpair a device: sudo ltunify unpair mouse
To get help: sudo ltunity --help

Mouse Xbindkeys

The M510 mouse has extra buttons on its left side and the scroll wheel  has a side-to-side click, but out of the box,the don’t do anything under Linux.  It would be nice to make use of these extra buttons.  To address this problem, I found pointers in these posts: How to get all those extra mouse buttons to workHow do I remap certain keys,  Mouse shortcuts with xbindkeys, and Guide for setup Performance MX mouse on Linux (with KDE).

Basically, using Xbindkeys, I want to map the mouse buttons with desired actions. I want to setup the M510 mouse extra buttons as follows:

    • Left-side Buttonup mapped to Page Up and down mapped to Page Down
    • Scroll Wheelmove left mapped to Copy and move right mapped to Paste
    • Scroll Wheelpress mapped to Paste

xev prints the contents of X events by creating a window and then asks the X Server to send it events whenever anything happens to the window.  It’s sort of a keyboard and mouse events sniffer.  If we know what event name the X Server gives to our buttons, then we can remap them. Using this program, we find out the following:

    • Left-side Buttonup is known by the X Server as button 9
    • Left-side Buttondown is known by the X Server as button 8
    • Scroll Wheelmove left is known by the X Server as button 6
    • Scroll Wheelmove right is known by the X Server as button 7
    • Scroll Wheelpress is known by the X Server as button 2

Now we need a mechanism to re-map mouse (or keyboard) button inputs.  Xbindkeys is is a X Windows program that enables us to bind commands to certain keys or key combinations on the keyboard and it will also work for the mouse.  The file  ~/.xbindkeysrc is what xbindkeys uses as a configuration file to link a command to a key/button on your keyboard/mouse.  There is also xbindkeys_config is an easy to use gtk program for configuring xbindkeys. To install these tools, do the following:

sudo apt-get install xautomation xbindkeys xbindkeys-config

To create your initial xbindkeys configuration file, just run the following command:

xbindkeys --defaults > $HOME/.xbindkeysrc

The syntax of the contents of .xbindskesrc is simple and is illustrated below:

# short comment
    "command to start"
        associated key

The "command to start" is simply a shell command (that you can run from a terminal),  and "associated key" is the key or button.

Now, using an editor, update the .xbindkeysrc file to include the following:

# Do a Page Down when mouse left-side down button is pressed
"xte 'key Page_Down'"
    b:8
# Do a Page Up when mouse left-side up button is pressed
"xte 'key Page_Up'"
    b:9
# Move scroll wheel to the left to copy text
"xte 'keydown Control_L' 'keydown Shift_L' 'key c' 'keyup Control_L' 'keyup Shift_L'"
    b:6
# Move scroll wheel to the right to paste text
"xte 'keydown Control_L' 'keydown Shift_L' 'key v' 'keyup Control_L' 'keyup Shift_L'"
    b:7
# Press scroll wheel to paste text
"xte 'keydown Control_L' 'keydown Shift_L' 'key v' 'keyup Control_L' 'keyup Shift_L'"
    b:2

To activate any modification of the .xbindkeysrc configuration file, your have to restart xbindkeys.   This can be done via:

pkill xbindkeys
xbindkeys

Other useful resources are:

    • xte is a program that generates fake input using the XTest extension
    • xvkbd is a virtual (graphical) keyboard program for X Window System which provides facility to enter characters onto other X clients by clicking on a keyboard displayed on the screen.
    • xbindkeys_show is a program to show the grabbing keys used in xbindkeys
    • xmodmap is a utility for modifying keymaps and pointer button mappings in Xorg.

Moving from SplashID to KeePass

I have been using the MS Windows based SplashID to store passwords, credit cards, account numbers, etc. securely on my PC and cell phone.  I got it to work under Wine but I’m considering Linux alternatives.  I’m growing tired of purchasing SplashID licenses and the user interface looks like it was designed in the 1970’s.  I came across “Five Best Password Managers” which gave me the incentive to check out KeePass.  KeePass is a cross platform, open source password manager.  It is extendable via its plugin framework, where additional functionality can be added.  It looks like I can use Dropbox and KeePassDroid to get the data on my cell phone.  I found these sites useful to get the job done:

The first step was to get KeePass installed in Ubuntu.  I found it on the Ubuntu Software Center or you can use:

sudo apt-get install keepass2 keepass2-doc

I then exported the contents of my SplashID database to a CSV file and imported it into keepass2.  I set up the KeePass2 database within my Dropbox folder.  This way, it can be scych’ed with my cell phone. I then installed KeePassDroid on my cell phone, pointing it at the database with the cell phones Dropbox.  KeePassDroid is a port of the KeePass password safe for the Android platform.

There is some cleanup of the fields within the KeePass2 database, but the data is now accessable on both my PC and my cell phone.

Installing Wine

Wine allows you to run many Windows programs on Linux. Instead of simulating internal Windows logic like a virtual machine or emulator, Wine translates Windows API calls into Linux calls.  I used the following to install Wine:

sudo add-apt-repository ppa:ubuntu-wine/ppa
sudo apt-get update
sudo apt-get install wine

Using Wine on Windows programs can be as simple  or complex, it all depends on the program.  Ubuntu provides some guidance on how to use Wine, also check out Wine Documentation and Wine HowTo.

As of this writing of the post, the only thing I loaded via Wine was SplashID, which worked without any challenges.

Installing PlayOnLinux

PlayOnLinux is based on Wine, and so profits from all its features, yet it keeps the user from having to deal with all its complexity.  I also install this package, in part because it comes pre-configured to load some popular tools.  I used it to install Internet Explore (sometimes its the only browser you can get to work on a site), and Kindle.

Installing RAID

RAID is an acronym for Redundant Array of Independent Disks and RAID as the first tier in your data protection strategy. It uses multiple hard disks storing the same data to protect against some degree of physical disk failure. The amount of protection it affords depends upon the type of RAID used.  I’m not going to go into all the types of RAID, nor their benefits, but you can find much of this information, and much more, in the following links:

In my case, I had an existing disk drive (non-RAID), loaded with data, and I wanted to add an additional drive to make it a RAID.  This presents some challenges since you’re attempting to preserve the data.  In this regard, I found the following links helpful:

I had already installed one SSD and one HHD disk drives in my system.  I then installed a third drive that matched the HHD drive.  My 128GB SSD has the device name of /dev/sda1 and mounted as /boot.  The currently installed 1TB SATA HDD has the device name of /dev/sdb1 and mounted as /home.  The newly install 1TB SATA HDD has the device name of /dev/sdc.

Description of the procedures I used to create the RAID is as follows:

    • Physically install the additional hard drive.
    • Install mdadm, which is the Linux utility used to manage software RAID devices.

sudo apt-get install mdadm

    • Partition the newly installed disk. Use the following inputs: n to establish a logic partition, p to make it a primary partition, 1  should be the partition number, use the same sectors as the currently installed drive, t to set the partition type, fd hex code type, p to print what the partition table will look like, w to write all of the changes to disk.

sudo fdisk /dev/sdc

    • Create a single-disk RAID-1 array (aka degraded array) with the existing hard drive. (Note the “missing” keyword is specified as one of the devices. We are going to fill this missing device later with the new drive.)

sudo mdadm --create /dev/md0 --level=1 --raid-devices=2 missing /dev/sdc1

    • At this point, if you do a sudo fdisk -l | grep '^Disk', you see a new disk, that being /dev/md0.  This is the RAID but not yet fully created.
    • Make the file system (ext3 type like the currently installed hard drive) on the RAID device.

sudo mkfs -t ext3 -j -L RAID-ONE /dev/md0

    • Make a mount point for the RAID and mount the device.

sudo mkdir /mnt/raid1
sudo mount /dev/md0 /mnt/raid1

    • Copy over the files form the original hard drive to the new hard drive using rsync.

sudo rsync -avxHAXS --delete --progress /home/* /mnt/raid1

    • Just  in case of a disaster, copy the original hard drive to the SSD /dev/sda1 root file system as /home_backup.

sudo rsync -avxHAXS --delete --progress /home /home_backup

    • After the copy, to see the status of the RAID, use the command sudo mdadm --detail /dev/md0.  What you see is that the /dev/sdc1 drives is in “active sync ” state but no reference to the other drive.  When you do cat /proc/mdstat you see “md0 : active raid1 sdc1[1]” but again no reference to the other drive.
    • Edit your /etc/fstab file and edit all references of /dev/sdb1 to /dev/md0 and reboot the system.  With this, /dev/md0 will be used as /home on the next boot. This will free up the existing hard drive so it can be made ready for the RAID.
    • With fdisk, re-partition /dev/sdb1 with a partition of type fd. Use the following inputs: n to establish a logic partition, p to make it a primary partition, 1  should be the partition number, use the same sectors as the currently installed drive, t to set the partition type, fd hex code type, p to print what the partition table will look like, w to write all of the changes to disk.

sudo fdisk /dev/sdb1

    • Add /dev/sdb1 to your existing RAID array.

mdadm /dev/md0 --add /dev/sdb1

    • The RAID array will now start to rebuild so that the two drives have the same data. Use the following command to check the status of the rebuild.

sudo mdadm -D /dev/md0

    • For Ubuntu, it seems it is also necessary to update the /etc/mdadm/mdadm.conf file. If this is not done, the RAID device will not be mounted when you reboot the system. The solution is to run the following command on your system, once the RAID drive has been configured:

sudo cp /etc/mdadm/mdadm.conf /etc/mdadm/mdadm.conf_backup
sudo mdadm --detail --scan >> /etc/mdadm/mdadm.conf

GNU Radio and Gqrx SDR Receiver

grc logoIn my last post, I was using the RTL2832 TV tuner dongle to get a simple Software Defined Radio (SDR) operational.  I wanted to use the SDR# program as my receiver but found that the MS Windows tool would not work and so I targeted Gqrx as an alternative. Gqrx is dependent on the GNU Radio.  So in this post, I plan to get Gqrx and GNU Radio up and operational with the RTL-SDR dongle.  I spend some time with other tools to help further verify (with mixed success) that GNU Radio is working.

The contain here comes from multiple source and I attempt to list those sources below.  For a good video to get a sense of what your in for, check out this video. Also, this post covers many of the topics here.

GNU Radio is a free & open-source software development toolkit that provides signal processing blocks to implement software defined radios. It can be used with readily-available low-cost external RF hardware to create software-defined radios, or without hardware in a simulation-like environment. It is being used in hobbyist, academic, and commercial environments to support both wireless communications research and real-world radio systems. 

Gqrx is an experimental AM, FM and Single Side Band (SSB) software defined receiver implemented using GNU Radio and the Qt GUI toolkit. Currently it works on Linux and can use the RTL_SDR dongles as input source.

Also within this post, I venture out from gqrx to examine a few other tools.  I don’t cover much territory, nor have much success.  The insperation to examine these other tools comes mainly from the lengthy post “RTL-SDR and GNU Radio with Realtek RTL2832U [Elonics E4000/Raphael Micro R820T] software defined radio receiver“.  Also check out “Getting Started with GNU Radio and RTL-SDR (on Backtrack)“.

Build GNU Radio on Ubuntu

The GNU Radio web site has specific instructions and a build script for installing it on Ubuntu (I’m using version 13.04).  This process claims it may take 1-2 hours to do the install (for me it ran in 1 hour 14 minutes).  The steps are as follows:

cd ~/src
mkdir ~/gnuradio
cd ~/gnuradio
wget http://www.sbrac.org/files/build-gnuradio && chmod a+x ./build-gnuradio && ./build-gnuradio --verbose

When prompted, tell it to proceed and give it sudo privilege by typing “Y”. Because of the --verbose option, you will see a lot of text whizzing by as the build-gnuradio script does its thing. You’ll also see a percentage complete indicator as the script works its way down it tasks.

The GNU Radio build creates a large variety of tools which get installed into /usr/local/bin.  You also notice that tools not directly related to GNU Radio are also created. I’ll leave it for another time to understand and explain the GNU Radio environment.

The “Hello World” of GNU Radio

To verify that the software is working, best thing is to create the typical “Hello, World” program, just we might have done for our first foray into C++, Python, or other programming language.  In the world of GNU Radio, this program has come to be the phone dial tone. To do this, I followed the video The “Hello World” of GNU Radio: Dial Tone and the gnuradio.org.  I did this using the GNU Radio Companion (executable located at /usr/local/bin/gnuradio-companion).  GNU Radio Companion (GRC) is a graphical tool for creating signal flow graphical models and generating Python source code for the model created.

GRC’s generated flow and code for the “Hello, World” program is listed below. The Python code for the dial tone program was placed in the home directory, and in my case, it was called dail_tone.py. While it can be executed via the gnuradio-companion, it can also be executed via python dial_tone.py. The user interface for the GRC and the corresponding Python code it generated is listed below:

dial_tone.grc - -home-jeff - GNU Radio Companion_006

#!/usr/bin/env python
##################################################
# Gnuradio Python Flow Graph
# Title: Dial Tone
# Author: Jeff Irland
# Description: "Hello, World" program - produces phone dial tone
# Generated: Sat Jun 22 21:24:56 2013
##################################################

from gnuradio import analog
from gnuradio import audio
from gnuradio import blocks
from gnuradio import eng_notation
from gnuradio import gr
from gnuradio import window
from gnuradio.eng_option import eng_option
from gnuradio.gr import firdes
from gnuradio.wxgui import fftsink2
from gnuradio.wxgui import forms
from gnuradio.wxgui import scopesink2
from grc_gnuradio import wxgui as grc_wxgui
from optparse import OptionParser
import wx

class dial_tone(grc_wxgui.top_block_gui):

	def __init__(self):
		grc_wxgui.top_block_gui.__init__(self, title="Dial Tone")
		_icon_path = "/usr/share/icons/hicolor/32x32/apps/gnuradio-grc.png"
		self.SetIcon(wx.Icon(_icon_path, wx.BITMAP_TYPE_ANY))

		##################################################
		# Variables
		##################################################
		self.samp_rate = samp_rate = 32000
		self.noise_slider = noise_slider = .005

		##################################################
		# Blocks
		##################################################
		_noise_slider_sizer = wx.BoxSizer(wx.VERTICAL)
		self._noise_slider_text_box = forms.text_box(
			parent=self.GetWin(),
			sizer=_noise_slider_sizer,
			value=self.noise_slider,
			callback=self.set_noise_slider,
			label='noise_slider',
			converter=forms.float_converter(),
			proportion=0,
		)
		self._noise_slider_slider = forms.slider(
			parent=self.GetWin(),
			sizer=_noise_slider_sizer,
			value=self.noise_slider,
			callback=self.set_noise_slider,
			minimum=0,
			maximum=.1,
			num_steps=1000,
			style=wx.SL_VERTICAL,
			cast=float,
			proportion=1,
		)
		self.Add(_noise_slider_sizer)
		self.wxgui_scopesink2_0 = scopesink2.scope_sink_f(
			self.GetWin(),
			title="Scope Plot",
			sample_rate=samp_rate,
			v_scale=0,
			v_offset=0,
			t_scale=0,
			ac_couple=False,
			xy_mode=False,
			num_inputs=1,
			trig_mode=gr.gr_TRIG_MODE_AUTO,
			y_axis_label="Counts",
		)
		self.Add(self.wxgui_scopesink2_0.win)
		self.wxgui_fftsink2_0 = fftsink2.fft_sink_f(
			self.GetWin(),
			baseband_freq=0,
			y_per_div=10,
			y_divs=10,
			ref_level=0,
			ref_scale=2.0,
			sample_rate=samp_rate,
			fft_size=1024,
			fft_rate=15,
			average=False,
			avg_alpha=None,
			title="FFT Plot",
			peak_hold=False,
		)
		self.Add(self.wxgui_fftsink2_0.win)
		self.blocks_add_xx_0 = blocks.add_vff(1)
		self.audio_sink_0 = audio.sink(32000, "pulse", True)
		self.analog_sig_source_x_1 = analog.sig_source_f(samp_rate, analog.GR_COS_WAVE, 350, .1, 0)
		self.analog_sig_source_x_0 = analog.sig_source_f(samp_rate, analog.GR_COS_WAVE, 440, .1, 0)
		self.analog_noise_source_x_0 = analog.noise_source_f(analog.GR_GAUSSIAN, noise_slider, 0)

		##################################################
		# Connections
		##################################################
		self.connect((self.blocks_add_xx_0, 0), (self.wxgui_scopesink2_0, 0))
		self.connect((self.blocks_add_xx_0, 0), (self.audio_sink_0, 0))
		self.connect((self.analog_sig_source_x_0, 0), (self.blocks_add_xx_0, 2))
		self.connect((self.analog_sig_source_x_1, 0), (self.blocks_add_xx_0, 1))
		self.connect((self.analog_noise_source_x_0, 0), (self.blocks_add_xx_0, 0))
		self.connect((self.blocks_add_xx_0, 0), (self.wxgui_fftsink2_0, 0))

	def get_samp_rate(self):
		return self.samp_rate

	def set_samp_rate(self, samp_rate):
		self.samp_rate = samp_rate
		self.analog_sig_source_x_0.set_sampling_freq(self.samp_rate)
		self.analog_sig_source_x_1.set_sampling_freq(self.samp_rate)
		self.wxgui_fftsink2_0.set_sample_rate(self.samp_rate)
		self.wxgui_scopesink2_0.set_sample_rate(self.samp_rate)

	def get_noise_slider(self):
		return self.noise_slider

	def set_noise_slider(self, noise_slider):
		self.noise_slider = noise_slider
		self.analog_noise_source_x_0.set_amplitude(self.noise_slider)
		self._noise_slider_slider.set_value(self.noise_slider)
		self._noise_slider_text_box.set_value(self.noise_slider)

if __name__ == '__main__':
	parser = OptionParser(option_class=eng_option, usage="%prog: [options]")
	(options, args) = parser.parse_args()
	tb = dial_tone()
	tb.Run(True)

When the GRC flow execution button is pressed, the scope and FFT plots are are created as shown below:

Dial Tone_005

The build for GNU Radio also installs the RTL-SDR software, so it would be wise to test GNU Radio with the RTL_SDR hardware and make sure everything is operating as expected.  I want to make a simple FM receiver, comparable to what was done via rtl_fm in RTL-SDR – Software Defined Radio (SDR) for $20. Something equivalent to:

rtl_fm -W -f 99.5M | play -r 32k -t raw -e signed-integer -b 16 -c 1 -V1 -

Using the following postings as a guide:

I had sufficient success to convince myself that GNU Radio was work.

Building Gqrx on Ubuntu

Gqrx is a software defined AM, FM and SSB software defined radio receiver for RTL-SDR based dongles (as well as the Universal Software Radio Peripherals and Osmo SDR devices).  It features a  Qt GUI.  As a QT program, you’ll need to make sure you have QT4 installed (version 5 will not work) and that you have the qtcreator tool is installed:

sudo apt-get install qt4-default
sudo apt-get install phonon-backend-gstreamer

Now download the source for Gqrx via its page on GitHub  and extract it into your target directory. The posting Getting Started With RTL-SDR and the README on the GitHub site where useful in understanding how to do the install.  I did the following:

cd ~/src
git clone git://github.com/csete/gqrx.git
cd gqrx
qmake gqrx.pro
make

At this point, you should find the gqrx executable in ~/src/gqrx directory.  Start up via ./gqrx and you’ll get the screen below (or set your values to equal this):

Configure I-O devices_001

Click “OK” and the screen below will pop up.  Make sure you have the RTL-SDR dongle plugged in and select the button on the top left to start processing data.  I have tuned the radio to a local FM station at 85.7MHz and listen to Washington Nationals vs. Phillies baseball!

Gqrx 0.0 - rtl=0_004

Building Multimode Radio Receiver

This radio receiver is capable of demodulating muitiple modes, specifically AM, FM, USB, LSB , WFM. TV-FM, PAL-FM. It’s easy to use and  has an automated scanning and spectral zoom features where clicking on the spectrogram or panorama to tune to the frequency of interest.

Multimode documentation is sparse to non existent. The posts “Using the Realtek RTL2832 USB “dongle” as a gnuradio multimode receiver” and “RTL-SDR and GNU Radio with Realtek RTL2832U [Elonics E4000/Raphael Micro R820T] software defined radio receiver” and “Getting Started with GNU Radio and RTL-SDR (on Backtrack)” gave some important hints on how to install multimode and get it operational.  I did the following:

cd ~
svn co https://www.cgran.org/svn/projects/multimode/trunk/ ~/src/multimode
make install

When I executed multimode.py, it didn’t product a display.  I suspect its some subtle Python code problem, or more likely.  incompatibility with the latest GNU Radio libraries.  For now, I’m going to abandon this.

GNU Radio Signal Scanner

gr-scan is a program  built upon GNU Radio, rtl-sdr, and the OsmoSDR Source Block.  This receiver constantly changes frequencies in a set order looking for a frequency that has someone transmitting. It is intended to scan a range of frequencies and print a list of discovered signals.  Installation involved the following steps:

cd ~./src
mkdir gr-scan
cd gr-scan

with your browser, download: http://www.techmeology.co.uk/gr-scan/gr-scan-2012082301.tar.gz
gzip -d gr-scan-2012082301.tar.gz
tar -xvvf gr-scan-2012082301.tar
cd gr-scan-2012082301
make

When I attempted to do the make, it complained about missing Gun Radio files.  I suspect the GNU Radio libraries and include files are layed out differently since the time gr-scan was designed (August of 2012).  I’m leaving fixing this to another time.

What’s Next

In this and the previous SDR posts, I focused on getting a taste of the technology without committing myself to much of an effort.  I really need to study and understand the tools that I have assembled. I still need to do a great deal more studying of  the radio spectrum itself … I feel like I’m wondering in the dark most of the time.

Also, I feel that I’m very limited by the antenna I’m presently using (the pitiful dipole that came with the RTL dongle).  I’m thinking of building a better antenna.  Maybe try to pickup a NOAA weather satellites, with its distinctive audio signal when demodulated, and decode one of its satellite weather photos …. maybe.

Another problem with the RTL-SDR is that its internal oscillator is cheap  and drifts, resulting in clock errors with  many kHz of frequency display error in SDR – depending on a band you’re listening to.  This is very annoying if you use your dongle as a radio scanner – what’s the point of knowing frequency of a transmitter if it’s almost random on your SDR?   This frequency error is linear across the spectrum, and can be adjusted in most SDR programs by entering a PPM (parts per million) offset value.  So I need to calculate this error offset so I can  calibrate the SDR software.

Linux Reboot … or … My System is Frozen and I Can’t Get Up!

sysrq-keyWhile I was building the environment for my Linux box,  I ran into some problems with Ubuntu.  I found myself with frozen screens or booted up into blank screens and other such things.  Seems that Ubuntu 13.04 is currently a bit unstable or I just screwed things up badly … a little of both I suspect. I managed to get through these problems, but too often I got desperate and I hitting the on/off switch to get the box rebooted.  Doing this can result in corrupted files and other such nasty things.  So this motivated me to research the “correct” way to get out of these Linux near death experiences.

The golden nugget here is actually at the end of this posting, that is the Magic SysRq Key.  This gem can get you out of most any freeze but I provide more here since the alternatives might be less intrusive.

Stopping a Running Process

While this post’s focus is on how to reboot Linux, keep in mind that sometimes the problem that your attempting to solve may be handled via a simpler approach.  Specifically, maybe you just need to kill a running process.

In the Bash shell, you can use job control:

    • Ctrl+C – halts the current command
    • Ctrl+Z – stops the current command, resume with fg in the foreground or bg in the background
    • Ctrl+D – log out of current session, similar to exit

On a Desktop version of Linux, there are normally six text consoles sessions available and one graphics session.  You could leave a frozen GUI, and go to a console screen to kill an offending process:

    • You can access the consoles by pressing CTRL + ALT + Fx (where Fx is a function key on the keyboard from F1 to F6).
    • Once you enter one of the consoles, you will be prompted for user name and password. Enter them and then you’ll reach a command prompt.  Now you can kill the offending process using the kill command.
    • To switch back to the graphic session, just click CTRL + ALT + F7.

The process “killing” could be done via the recommended kill -SIGTERM pid  or the more forceful kill -SIGKILL pid. There are also versions of these tools, killall and pkill, that use the name of the process as an argument instead of the process ID.

xkill is a utility for forcing the X server to close connections to clients. Closing an X application that has become unresponsive, or misbehaving in general. Execute xkill, and once it’s running, you simply click on the window you wish to  kill, and it performs a kill -9.

When Kill -9 Does Not Work

You are supposed to be able to kill any process with kill -9 pid, but you may come across a process that just will not die. Usually this happens when you are trying to kill a zombie process or defunct process. These are processes that are dead and have exited, but they remain as zombies in the process list. The kernel keeps them in the process list until the parent process retrieves the exit status code by calling the wait() system call. This does not usually happen with daemon processes because they detach themselves from their parent process and are adopted by the init process (PID=1) which will automatically call wait() to clear them out of the process list.

You may sometimes see the daemon defunct PID in the process list for a brief moment before it gets cleaned up by the init process. You don’t have to worry about these. You can also end up with an unkillable process if a process is stuck waiting for the kernel to finish something. This usually happens when the kernel is waiting for I/O. Where you see this most often is with network filesystems such as NFS and SaMBa that have disconnected uncleanly. This also happens when a drive fails or if someone unplugs a cable to a mounted drive. If the device had a memmapped file or was used for swap then you may be really screwed. Any kernel calls that flush IO may hang forever waiting for the device to respond.

Zombies can be identified in the output from the process status command ps by the presence of a “Z” in the “STAT” column. Zombies that exist for more than a short period of time typically indicate a bug in the parent program, or just an uncommon decision to reap children.  A zombie process is not the same as an orphan process. An orphan process is a process that is still executing, but whose parent has died. They do not become zombie processes; instead, they are adopted by init (process ID 1), which waits on its children.

Standard Reboot Commands

The vast majority of your systm shut downs or reboots will follow one of these two forms.  The first will halt the system so you can power it off and the second will reboot the system:

shutdown -h now
shutdown -r now

shutdown is the preferred and the safest ways to stop Linux. Never the less, in the tradition of Unix, Linux gives you more than one  way to accomplish this task.   reboot, halt, and poweroff are some additional commands that Linux provides to stop the system.  These commands can be more “forceful” than shutdown but similar to it.

The simplicity of these commands give the illusion that the system state of Linux is running or not running.  It isn’t quite that simple.  Linux can operate in several states called runlevels.

Linux Runlevels

A runlevel is a preset operating state for the Linux operating system.  A system can be booted into  any of several runlevels, each of which is represented by a single digit integer. Each runlevel designates a different system configuration and allows access to a different combination of processes and system resources.

Seven runlevels are supported in the standard Linux kernel. They are:

    • 0 – System Halted:  all system activity is stopped, the system can be safely powered down
    • 1 – Single User:  single superuser is the only active login and no daemons (services) are started. It is mainly used for maintenance.
    • 2 – Multiple Users: multiple users allowed but network filesystem (HFS) is not.
    • 3 – Multiple Users:  multiple users are allowed command line (i.e., all-text mode); the standard runlevel for most servers
    • 4 – User-Definable
    • 5 – Multiple Users: multiple users are allowed graphical user interface; the standard runlevel for most desktop systems
    • 6 – Reboot: just like run level 0 except a reboot is issued, used when restarting the system

In the interests of completeness, there is also a runlevel ‘S’ that the system uses on it’s way to another runlevel. Read the man page for the init command for more information, but you can safely skip this for all practical purposes.

By default Linux boots either to runlevel 3 or to runlevel 5. The former permits the system to run all services except for a GUI. The latter allows all services including a GUI.

Booting into a different runlevel can help solve certain problems. For example, if a change made in the X Window System configuration on a machine that has been set up to boot into a GUI has rendered the system unusable, it is possible to temporarily boot into a console (i.e., all-text mode) runlevel (i.e., runlevels 3 or 1) in order to repair the error and then reboot into the GUI.  Likewise, if a machine will not boot due to a damaged configuration file or will not allow logging-in because of a corrupted /etc/passwd file  or because of a forgotten password, the problem can solved by first booting into single-user mode (i.e. runlevel 1).

There are two commands for directly reading or manipulating the Linux rumlevels:

    • runlevel – Use the runlevel command to tell you two things: The last run level, and the current run level.  If the first character is ‘N’, it stands for none, meaning there has been no run level change since powering up.
    • telinit – The program responsible for altering the runlevel is init, and it can be called using the telinit command.

The topic of runlevels is actually much richer than what is illustrated here.  It plays a key role in Linux background processes, called services or daemons.  For more, check out this Managing Services in Ubuntu, Part I: An Introduction to Runlevels and Part II.

Getting a Login From a Frozen GUI Screen

A not so common problem is when a frozen, full screen X application takes control over your mouse and keyboard and it seems that the only way to regain access to the system is to force a shutdown.  The fact is, if you could get to a some form of terminal session, you might be able to kill the offending process and get out of this frozen state.  This is where accessing a console screen by pressing CTRL + ALT + Fx (where Fx is a function key on the keyboard from F1 to F6) can be very handy.

The X Server can often be the source of these frozen screen situations, so restarting the X Server may be the solution.  This can be done via the key combination Ctrl+Alt+Backspace.  Keep in mind that you will loses any unsaved data in applications.  Also, this capability is turned off by default on may Linux systems (including Ubuntu).  This was done to avoid confusion by  people accustom to MS Windows.  An alternative key combination is as follows:

Press AltGR + SysRQ + K instead (AltGR is the RIGHT ALT button and SysRQ is labelled “Print Screen” most of the times, and remember to press and hold the keys in the in the right sequence, e.g. starting with ALtGR, and ending with the K(ill) key).

You can turn back on the Ctrl+Alt+Backspace by following the instructions here.

Magic SysRq Key

If the system is completely locks up, or your filesystem fails, there are still alternatives. The “magic SysRq key” provides a way to send commands directly to the kernel through the /proc filesystem. It is enabled via a kernel compile time option, CONFIG_MAGIC_SYSRQ, which seems to be standard on most distributions.The magic SysRq key (or PrintScrn or Print Screen on some keyboards) is a key combination understood by the Linux kernel, which allows the user to perform various low-level commands regardless of the system’s state. This is a surprising feature of the kernel but is commonly used to perform a safe reboot of a locked-up Linux computer.  See this post for some historical perspective of the SysReq key.

To check if the CONFIG_MAGIC_SYSRQ option is enable on your Linux kernel, check the configuration file that installed to /boot partition.  Do this via:

cat /boot/config-$(uname -r) | grep CONFIG_MAGIC_SYSRQ

If your get “CONFIG_MAGIC_SYSRQ=y", then its enabled on your kernel.

When running a kernel with SysRq compiled in, /proc/sys/kernel/sysrq controls the functions allowed to be invoked via the SysRq key.  If the file contains “1“, that means that every possible SysRq request is allowed. See here for more on the /proc/sys/kernel/sysrq.

To actually reboot the machine there is a well know key sequence to follow: REISUB (or REISUO if you want to turn off the system instead of reboot).  Basically, if you keep pressed ALT + SysRq + R and then while you keep pressed ALT + SysRq you press E, I, S, U, B with about 1 second between each letter (do not type it fast). Your system will reboot. This  is a safer alternative to just cold rebooting the computer.

Mnemonic for REISUB is Reboot Even If  System Utterly Broken, and the keys pressed do the following:

R – Switch to XLATE mode
E – Send Terminate signal to all processes except for init
I – Send Kill signal to all processes except for init
SSync all mounted filesystems
U – Remount filesystems as read-only
B – Reboot

The magic SysRq key supports more then just the REISUB keys.  To see the larger range of thing you can do via Magic SysRq Key’s direct communications with the kernel, check out here.

RTL-SDR – Software Defined Radio (SDR) for $20

While researching the GNU Radio project, I came upon references to the RTL2832 TV tuners. These dongle are made to receive and decode the European standard digital television, Digital Video Broadcasting — Terrestrial (DVB-T). (By the way, the North American standard is Advanced Television Systems Committee (ATSC), and not  compatible with DVB-T, so this will not work in North America for TV reception.)  In 2012, Antii Palosaari, discovered that there is a device mode for the Realtek DVB-T device chip (RTL2832U) in which raw samples can be captured and transferred to a host computer. This feature enables this device to be used as an inexpensive “front end”  for a Software Defined Radio (SDR) that could be implemented on a PC or other device.

A SDR provide the ability to sample and record the electromagnetic energy (or radio frequency, called “RF” for short) with no preconceived idea as to the structure of the RF signal.  In a sense, you can interact with the RF signal in its must fundamental form.  In addition, a SDR allows you to implement, by means of software, a radio communication system where components that have been typically implemented in hardware.

SDR solutions for the professional-grade applications and amateur radio have been around for some time, but the appearance of cheap solutions for the hacker is new.  There are general purpose SDR platforms for over $1000, like the Ettus Research Universal Software Radio Peripheral (USRP), the $525 SDR-IQ Receiver, to the $450 bladeRF from the Kickstarter Nuand or Great Scott’s DARPA-Funded HackRF for an estimate $300, and now the $20 hacker grade dongle discussed here.  But unlike most of the other referenced solutions,  the dongle  requires a PC, or some sort of attached processor, to provide the signal processing.

In all SDR solutions, a significant amounts of the signal processing is handed over to a numerical processor, rather than being done in special-purpose RF hardware. Such a design produces a radio which can receive and transmit widely different radio protocols (referred to as a waveform) based solely on the software used.  So in a SDR solution, the electromagnetic waveform is rapidly sampled, the sample values are converted to numerical values, and these numbers are manipulated via a discipline called digital signal processing (DSP).  Ultimately, the resulting DSP numerical values produced are converted to an analog signal that goes to a speaker, TV, or other such output device.

The DVB-T dongles can provide a critical component of a cheap SDR, since the chip allows transferring the raw I/Q samples to the host. What I/Q samples are is well beyond what I wish to describe here, but let it be said that practical hardware design concerns make I/Q data the critical for signal processing.  So the fact the dongle does the digital sampling, called a analog-to-digital converter (ADC), and outputs I/Q samples, makes it a valuable asset for a SDR solution.

So how does one get your PC configured to take the dongles I/Q output and create a SDR?  There is GNU Radio (where this post first begun), but a simpler starting point would be the popular, easy, and open source SDR#.  SDR# can perform the required signal processing in an intuitive user interface (if your into Ham Radio, or bit of a RF hacker, and such).  Unfortunately, I couldn’t get SDR# (a MS Windows application) to operate under  Linux and I had to resorted to some simpler utilities.

The Dongle

All this sounds exciting to me (what a geek!) so I purchased from Amazon one of the dongles, specifically the NooElec TV28T v2 USB DVB-T,  FM+DAB & RTL-SDR Receiver, RTL2832U & R820T Tuner, MCX Input.

71RaTxr2WJL._SL1500_

NooElec TV28T

    • NooElec TV28T – This is the manufacture and model name for the device
    • DVB-T – This device is made to receive and decode the European standard digital television, Digital Video Broadcasting — Terrestrial (DVB-T)
    • FM+DAB & RTL-SDR Receiver – The device can also receive FM radio and Digital Audio Broadcasting (DAB) used in several countries, particularly in Europe. RTLSDR is the popular name give to this class of device, which contain the RTL2832U chip, which can be hacked for SDR use.
    • RTL2832U & R820T Tuner – These are the DVB-T demodulator and TV Tuner chips used in the device.
    •  MCX Input – Is a 3.6 millimeter (0.14 in) micro coaxial (MCX) coaxial RF connector 30% smaller that Sub-Miniature version B (SMB) connectors that are typically used in the USA.  MCX is a standard in Europe. It provides broadband capability from DC to 6 GHz.

From the research I have done, I have found that this dongle provides an approximate tuning range of 25MHz-1700MHz for the SDR.  It has been demonstrated to be compatible with most SDR software, including SDR#.  You can pick up FM radio but  don’t expect to pick up long-wave or AM broadcasts since their spectrum lies below 25MHz. You can listen to the 12m 10m 6m 2m 1.25m 70cm 33cm and 23cm ham band, as well as CB, Marine VHF, RC Band, FRS, GMRS, and Airband (Aviation).

The dongle will not provide the desired SDR function out of the box.  It must first be configured (aka hacked) to stream the I/Q samples to the USB output.  This is where Antii Palosaari’s discovery comes into play.  The wiki’s rtlsdr.org and OsmoSDR are good sources for disparate information concerning RTL2832U based SDR, typically called RTL-SDR.  For my purposes, I wanted to get something initially working on my PC (Linux OS) but ultimately I wanted to have the dongle attached to a Raspberry Pi (RPi) and have the RPi be a server or archive of I/Q samples (sort of a intelligent wide band scanner as done in Raspberry Pi and DVB-T receivers and here Raspberry Pi as Remote Server for RTL2832u SDR and here SDR with Raspberry Pi and DVB-T receivers) that could be processed by my PC.  Therefore, the first step is to get the dongle and a good SDR processor working on my PC.

Building rtl-sdr Library and Capture Tools

The  OsmoSDR wiki has some good instructions on how to build the rtl-sdr software. I basically followed the wiki’s instructions but I had to first install cmake (sudo apt-get install cmake) and libusb (sudo apt-get install libusb-1.0-0-dev) to get a successful make.  I then using the following commands:

cd ~/src
git clone git://git.osmocom.org/rtl-sdr.git
cd rtl-sdr/
mkdir build
cd build
cmake ../
make
sudo make install
sudo ldconfig
cmake ../ -DINSTALL_UDEV_RULES=ON

The result is source code placed in ~/src/rtl-sdr/build/src and the executables are placed in /usr/local/bin: rtl_adsb, rtl_eeprom, rtl_fm, rtl_sdr, rtl_tcp, rtl_test.  The documentation for these utilities is nearly non-existent.  The only documentation I could fine is for the rtl_fm, a posting called Rtl_fm Guide: The long lost documentation.  If you use the command line option --help, you will get some description for each of the tools (see the very end of this post for some screen captures).  Here is a short description and some example usages:

    • rtl_sdr – This is an I/Q recorder for RTL2832 based DVB-T receivers. To send 10 samples to stdout, and sampled at 1.8Ms/s with frequency tuned to 392MHz: rtl_sdr -s1.8e6 -f392e6 -n10 -.
    • rtl_test – Bench-marking tool for RTL2832 based DVB-T receivers.  The -t option only works for Elonics E4000 tuners (Therefore, on non-E4000 tuners, you can not test for the tuning range).  To check the possible tuning range: rtl_test -t.  To check the maximum sample-rate possible on your machine (change the rate down until no sample loss occurs): rtl_test -s 2.5e6
    • rtl_fm – A simple narrow band FM demodulator for RTL2832 based DVB-T receivers.  Rtl_fm is a general purpose analog demodulator. It can handle FM, AM and SSB. It can scan more than a hundred frequencies a second. Make sure rtl_fm and the player are both set to use the same data rate.  Tune into a local FM radio station : rtl_fm -W -f 99.5M | play -r 32k -t raw -e signed-integer -b 16 -c 1 -V1 -
    • rtl_tcp –  An I/Q sample server for RTL2832 based DVB-T receivers.  I/Q samples are streamed to a specified IP address and port.
    • rtl_adsb – A simple Automatic dependent surveillance-broadcast (ADS-B) decoder.  ADS-B is a surveillance technology for tracking aircraft as part of the Next Generation Air Transportation System (NextGen).
    • rtl_eeprom – An EEPROM programming tool for RTL2832 based DVB-T receivers.

First Run of the Dongle

The first thing to do is to plug in the dongle and run the test rtl_test -t.  It gave me an error statement expressing “installing the udev rules file rtl-sdr.rules”.  The site “rtl-sdr on Ubuntu” provides some instructions on how to fix this.  The command lsusb | grep Realtek gives me the information I need to create the following entry into /etc/udev/rules.d:

SUBSYSTEM=="usb", ATTRS{idVendor}=="0bda", ATTRS{idProduct}=="2838", GROUP="adm", MODE="0666", SYMLINK+="rtl_sdr"

After another try, I got a successful test.  Next, I sent ten I/O samples to stdout and then tuned into a local FM radio station using these commands:

rtl_sdr -s1.8e6 -f392e6 -n10 -
rtl_fm -W -f 99.5M | play -r 32k -t raw -e signed-integer -b 16 -c 1 -V1 -

sdrsharp

SDR Sharp

Getting SDR# Running in Linux (didn’t work)

The  rtlsdr.org wiki has some instructions on how to get SDR# working within Linux.  Also, the SDR# home page has a link called One shot install script for Linux. Both these sites require you to build the software from source code. Mono is able to run Microsoft .NET applications in Linux.  I attempted this and got errors that I could not figure out (I’m not a MS Windows developer type and I’m not interested becoming one!).

Given this, I chose a different path. I found another posting that claim to get SDR# running in Linux. In this case, only executable will be loaded, not source code that needs to be compiled. You can download SDR# executable from this posting.  You’ll also need to install mono and PortAudio.  Here is how I did it:

sudo apt-get install mono-complete monodevelop
sudo apt-get install libportaudio2
cd ~/src
mkdir sdrsharp
cd sdrsharp

Within ~/src/sdrsharp, install the downloaded SDR# zip file and unzip it.

cd sdr-nightly
ln -s /usr/local/lib/librtlsdr.so librtlsdr.dll
ln -s /usr/lib/i386-linux-gnu/libportaudio.so.2 libportaudio.so

Note, for the above link, you may need to use locate libportaudio.so.2 to find the PortAudio library.

To test things out, I ran the application using mono sdrsharp.exe and got a core dump.  I attempted this again using the stable version of SDR# instead of the nightly build and got the same results.  After the typical thrashing about, I found a bug report for this problem.  Also see “SDR Software – Good, bad and very ugly“.  Also, there seems to be some sort of dispute between SDR# and a new group calling itself Open SDR#.  I’m not sure, but what appears to be at the heart of this is the level of support of SDR# within Linux.  All this is disappointing since SDR# is a very popular tool and I wish I could find away to make use of it within Linux.

The next logical SDR tool to try would be the Linux-based Gqrx SDR receiver, but in this case, it is dependent on GNU Radio.  I’m attempting to delay my conquest of GNU Radio until I do some experimenting with the dongle.  So lets turn our attention to a much simpler tool.

Getting RTLSDR Scanner Running

RTLSDR Scanner is a simple frequency scanning GUI using the OsmoSDR rtl-sdr library.  I more or less followed the installation instructions but they are confusing/out-of-date and you’ll needed to do some adjustments.  The OsmoSDR rtlsdr library has already been installed earlier in the text, so its not listed here.  To get the required files for RTLSDR Scanner:

sudo apt-get install python python-wxgtk2.8 python-matplotlib python-numpy
cd ~/src
git clone git://github.com/roger-/pyrtlsdr.git
cd pyrtlsdr
sudo setup.py
cd ~/src
git clone git://github.com/EarToEarOak/RTLSDR-Scanner.git

With this, I found I could run ~/src/pyrtlsdr/demo_waterfall.py.  Make sure to read the comments in the file to understand how to change the center frequency, gain, etc.  The image below is demo_waterfall.py tuned to the amateur radio 6 meters band.  The image is called a spectrogram (sometimes call spectral waterfall) is a dynamic, visual representation of the spectrum of frequencies in the RF signal.  Blue is low signal strength, where yellow, and red are higher strengths.

demo_waterfall.py

demo_waterfall.py

To get ~/src/RTLSDR-Scanner/src/rtlsdr_scan.py to work, I had to do some coping of files as shown below:

cp ~/src/pyrtlsdr/rtlsdr/rtlsdr.py  ~/src/RTLSDR-Scanner/src/rtlsdr.py
cp ~/src/pyrtlsdr/rtlsdr/librtlsdr.py  ~/src/RTLSDR-Scanner/src/librtlsdr.py

The image below is from rtlsdr_scan.py, again tuned to the amateur radio 6 meters band.  Here again you see the signal strength of the individual amateur radios as vertical spikes.

rtlsdr_scan.py

rtlsdr_scan.py

So we now have auditory and visual proof the dongle is doing its job. Now its on to GNU Radio!

Command-Line Options for RTLSDR Capture Tools

For reference purposes, below are screen shots of the RTLSDR capture tool’s command line options.

rtl_test -s

rtl_test -s

rtl_test

rtl_test

rtl_tcp

rtl_tcp

rtl_sdr

rtl_sdr

rtl_adsb

rtl_adsb

rtl_fm

rtl_fm

Building My Linux Box…The Plan

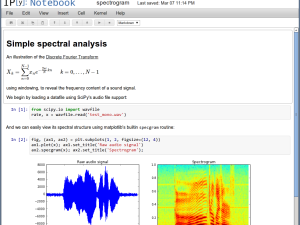
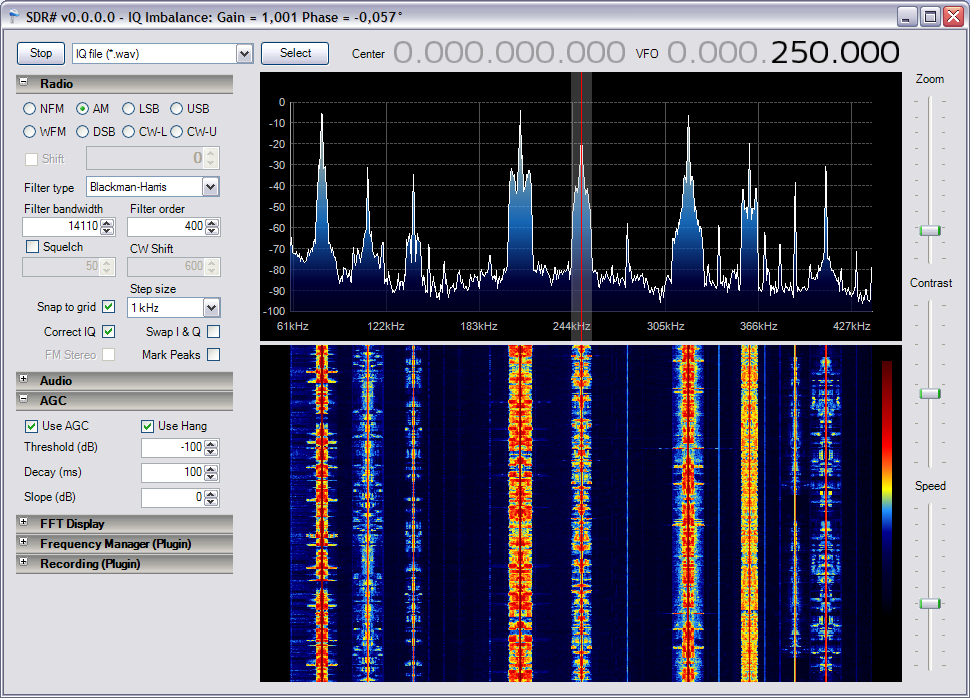
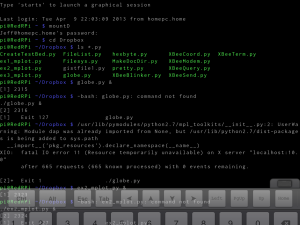
I concluded it was time to retire my current PC (a Dell Dimension XPS 400, Intel Pentium D 820, 2.8GHz w/Dual Core Technology, 2G of memory, purchased in January 2006 for  ~ $2,500) and replace it with something better, aka faster.  It’s performing poorly, but most of all, I want to do some experimenting with iPythonmatplotlib, as well as, GNU Radio & digital signal processing.  To do this justice, I need a faster box and ideally loaded with Linux and X Windows.

I also think its time for me to build my own box, instead of purchase it already packaged and assembled.  They say you get more for your dollar, or at least you can invest the same money into things that will make a better system (instead of some more crappy speakers, mice, keyboards, etc.).  Given I’m building it, I want to pay special attention to getting the performance up.  I don’t need the top of the line CPU (I don’t believe you get sufficient value for your money), but I would invest in improving the predominate enemy of computer performance, that is I/O.  Also, I want the graphics to be fast and smooth.  The work on matplotlib and signal processing is likely to be graphically intensive.  I’m not going to be playing games on the system, but I’m going to keep an eye on the gaming communities hardware preferences.   I’m willing to go with a good (but not super, and therefore expensive) graphics board.

A fancy sound system isn’t a priority for me.  While my interest in GNU Radio & digital signal processing may have some use for a good sound system, I think I could live with the integrated sound system that will come on the motherboard.  Like graphics, if  it proves unacceptable, I’ll make the investment on another occasion.

Since I’m buying components and assembling it, I want to do some cherry picking.  When a vendor sells you an assembled box, they are often using cheaper / less functional components to save them cost.  I’m picking an Intel Core i5 CPU (I believe it has the best value for me).  Also, I’m going to get a -K Series Intel CPU and motherboard designed for overclocking and provide optimal performance for gamers and high-power users.  While I’m not doing gaming, I like the option to tuning the hardware and I have found the -K Series to be only slightly more expensive.  For a small amount of additional cash, I get some cool capabilities.

To get the better I/O that I want, I’m going to purchase one solid-state drive (SSD) from which I plan to boot Linux.  SSD’s are very much more expensive byte-for-byte when compared to a standard hard drive but boy they can fly!  Faster CPU and faster drives are my most valuable investment.  With the  financial investment in the SSD, I’m not going to purchase new hard drives but reuse the ones I have in my current PC (I’ll need them since the SSD I can budget for will not be large).  They are newer then the original Dell box, and besides  the hard drive has over 6 years of stuff on it, including a MS Windows environment that I have grown dependent on.  That brings me to the next point.

I want to dual boot the system with both MS Windows and Linux.  The Linux will be on the SSD, and it is here that I plan to spend much of my time.  I want to pick a Linux distribution that is well supported, popular, and a good graphic desktop environment.   I grew up on the Linux command line (then it was Unix) and I feel at home there, but I would like to try out the X Windows desktop.  If at all possible  I want the MS Windows to boot from my current hard drive.  I don’t want to have to reload software or copy an image … you never can get it to be the same again.  If I must, I’ll make the MS windows drive the default boot as it is now (and Microsoft seems to insist on being default).  If I can do this, moving into my new PC will be painless.

With my objectives and priorities fully articulated, lets explore what I intend to build.

Central Processing Unit (CPU)

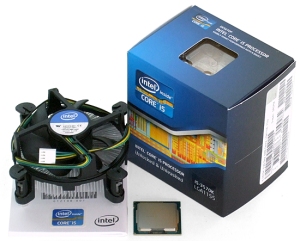
For my CPU I have picked the Intel Core i5-3570K Ivy Bridge 3.4GHz (3.8GHz Turbo Boost and 6M Cache) LGA 1155 77W Quad-Core Desktop Processor which includes Virtualization Technology (VT-x), and Intel HD Graphics 4000.  What a mouth full …. here is what this all means:
intel core i5 3570k with stock cooler

    • Intel Core – Intel Core (sometimes refereed to as Core 2) is a brand name that Intel uses for various mid-range to high-end consumer and business microprocessors. In general, processors sold as Core are more powerful variants of the same processors marketed as entry-level Celeron and Pentium. Similarly, identical or more capable versions of Core processors are also sold as Xeon processors for the server and workstation market.
    • i5-3570K – The very first question after you concluded that your going with the Intel Core line, is Core i3 vs. i5 vs. i7 – Which one is right for me?   I’m driven to the i5 since the current Intel Core i5 models are generally considered the best price/performance choice for a gaming system and the i7  do NOT have built-in graphics capability (this would force me to buy a graphics card). Why K versions you ask? Well, the default Ivy Bridge processors are much harder to overclock, where the K series are unlocked and come with tools for overclocking.  This processor has overclocked test results running at a stable 4.7GHz.
    • Ivy Bridge –  Ivy Bridge is the latest generation of processors within the Intel Tick-Tock Development Model.   Intel introduced its Sandy Bridge desktop and laptop processors at the start of 2011 as there new micro-architecture …the tock.  Intel introduced Ivy Bridge in April 2012 new processor technology … the tick.  There is a school of thought that says you shouldn’t buy the last generation CPU because you can get more value (aka performance/dollar) from the previous generation.  But the prices I have seen and the comparative reviews have given me the courage to go with the latest generation.  Also check out this review with a description of Ivy Bridge.
    • Turbo Boost – This feature increases performance of both multi-threaded and single-threaded workloads.  Intel Turbo Boost Technology 2.0 allows the processor core to opportunistically and automatically run faster than its rated operating frequency/graphic render clock if it is operating below power, temperature, and current limits. It can boost the frequency up to 3.8GHz.
    • 6M Cache – This refers to cache used by the central processing unit of a computer to reduce the average time to access memory. The cache is a smaller, faster memory which stores copies of the data from the most frequently used main memory locations.  It comes it three types: L1, L2, and L3. L1 cache (sometimes called primary cashe) is the fastest cache and it usually comes within the processor chip itself.  L2 cache comes between L1 and RAM (processor-L1-L2-RAM) and is bigger than the primary cache. The L1 and L2 cache is per core but the last-level cache (L3), is shared among all cores and sometimes call Smart Cache since cache can be dynamically assigned to a core as it needs it. The “6M” refers to the number of bytes of data that the L3 cache can hold.
    • LGA 1155 – LGA 1155, also called Socket H2, is an Intel microprocessor compatible 1155 pin socket which supports Intel Sandy Bridge and Ivy Bridge microprocessors.
    • 77W – This is the  Thermal Design Power (TDP) is the maximum power consumed by the CPU under normal / regular use. In other words, the TDP is the max power a device will dissipate when running real applications. What’s more the TDP is given for graphics card default clocks.  TDP is a manufacturer’s data, and thanks to this information, CPUcooler manufactures can size their CPU coolers.
    • Quad-Core Desktop Processor – This is a multi-core processor (in fact a quad or 4 core)  computing component with four independent actual central processing units (called “cores”).  Intel manufacturers the four cores onto a single integrated circuit die (known as a chip multiprocessor or CMP), or onto multiple dies in a single chip package.  The proximity of multiple CPU cores on the same die allows it to operation at a much higher clock-rate than is possible if the signals have to travel off-chip.
    • Virtualization Technology – VT-x  (i.e. x86 virtualization or Vanderpool) is the facility that allows multiple operating systems to simultaneously share x86 processor resources in a safe and efficient manner, a facility generically known as hardware virtualization. With virtualization, you can have several operating systems running in parallel, each one with several programs running.  Each operating system runs on a “virtual machine”, i.e. each operating system thinks it is running on a completely independent computer. Note that on the Intel Core technology, the virtual machines are not assigned specific CPUs among the multiple CPUs but are shared by all.
    • Intel HD Graphics 4000 – Before the introduction of Intel HD Graphics, Intel integrated graphics were built into the motherboard’s northbridge.  HD Graphics 4000 is Intel’s 3rd generation of this integrated GPU technology.  The HD 4000 was completely redesigned and offers many improvement. The IPC (instructions per clock) can therefore be even 2x as fast  and overall up to 60% more performance should be possible.

One highly desirable feature missing from the Intel i5 line is Hyper-Threading Technology.  Hyper-Threading (HT) is a means for improving processor performance by supporting the execution of multiple threads (two is the current limit) on the same processor at once: the threads share the various on-chip execution units.  HT is available on the i7 line of processors but I just can’t justify the cost of this additional functionality.

Motherboard (Mobo)

I need to match the CPU to a -K Series motherboard and I picked the Intel Desktop Board DZ77GA-70K with Intel Z77 Express Chipset family which includes Intel High Definition Audio
Intel Desktop Board DZ77GA-70K
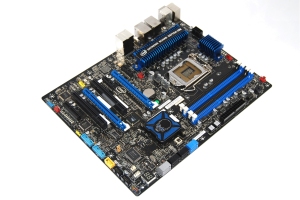
. The Intel high-definition audio chip allows you to use your computer to send digital audio signals to speakers, headphones, telephones and other audio equipment. Early computer audio systems could only produce simple stereo sound reproduction. The Intel HD audio system supports surround sound up to Dolby 7.1.  It supports the  usual 32GB of RAM, Smart Response TechnologySmart Connect Technology, Intel Rapid Storage Technology (Intel RST) for RAID 0, 1, 5, and 10. The “GA” in the motherboard’s name means that it contains Bluetooth/WiFi and the a front panel USB 3.0 module  (“GAL” means it has no Bluetooth/WiFi). The board supports Intel’s Fast Boot Technology which can dramatically reduce the time to boot the system. Support for high end graphics boards. It has eight  USB 3.0 ports (4 external/4 header), ten USB 2.0 ports (4 external (2 Hi-Current/Fast Charging) / 6 internal), four Serial ATA 6.0 Gb/s ports, one eSATA 6.0 Gb/s, four Serial ATA 3.0 Gb/s ports and many other features.

The Mobo comes with the Intel Visual BIOS graphical interface and animated controls, which allow you to configure settings faster and take full advantage of your Intel -K processors. The Visual BIOS uses the Unified Extensible Firmware Interface (UEFI) which defines a software interface between an operating system and Mobo firmware. UEFI is meant to replace the Basic Input/Output System (BIOS) firmware interface, present in all IBM PC-compatible personal computers.

The form factor for this Mobo is ATX.  ATX (Advanced Technology eXtended) is a motherboard form factor specification developed by Intel in 1995 to improve on previous de facto standards like the AT form factor.  There are different form factor of motherboards including microATX, Standard ATX and XL-ATX.  This is important to keep in mind when picking a case.

The selling feature for me was that its an Intel product (motherboards are new to me and I need the emotional support), seems easy to setup, it has gotten reasonable reviews (and here is another), and reasonable price.  It isn’t most feature full Mobo nor what a die-hard overclocker would buy but it seems a solid, stable product that will not give me any troubles or support problems and will perform well.

Memory (RAM)

According to the September 2011 Steam hardware survey, 4GB of RAM is currently the most popular configuration among gaming PCs. This may be sufficient for a light home user, however, many power users and enthusiasts find 4GB to be insufficient. Many recommend at least 6GB for any enthusiast PC, especially in light of the relatively
Corsair Vengeance low cost of memory.  I’m going with 8GB of RAM in an effort to assure good I/O and 12GB or 16GB just seems like more than I will need.  That amount of memory seems sufficient for you average gamer and should work for me.  And the reviews I have seen also claim they have successively overclocked this memory.

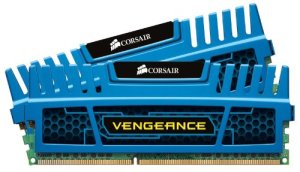
I also want to keep open the option to do some overclocking, so I need to consider memory based on Intel’s  Extreme Memory Profile (XMP).  I also want a memory provider with a solid reparation.  The Intel Core i5-3570K processor requires DDR3-1333/1600 memory.  With all this in mind, I choose the 8GB (2X4 GB) Corsair Vengeance Blue, 9-9-9-24, 1.5V  PC3-12800 1600MHz DDR3 240-Pin SDRAM Dual Channel Memory.   They are not top of the line memory but seem a good fit for my needs and have gotten solid reviews.

DDR3 or DDR3 SDRAM, an abbreviation for double data rate type three synchronous dynamic random access memory, is a modern kind of dynamic random access memory (DRAM) with a high bandwidth interface, and has been in use since 2007.  The primary benefit of DDR3  over its immediate predecessor (i.e. DDR2), is its ability to transfer data at twice the rate (eight times the speed of its internal memory arrays), enabling higher bandwidth or peak data rates. The next generation,  DDR4 expected to be released to the market sometime in 2013.  Its primary benefits compared to DDR3 is the higher range of clock frequencies (200MHz vs 166MHz) and data transfer rates (400MT/s vs 333MT/s).

DDR3 memory is classified according to the maximum speed at which it can work, as well as their timings. Timing are numbers such as 3-4-4-8, 5-5-5-15, 7-7-7-21, 9-9-9-24 where lower is better. Memory speed is specified via a number like this: DDR3-xxx / PC3-yyy or DDR3-xxx/yyy. The xxx number indicates the maximum clock speed that the memory chip supports. Therefore, DDR3-1333 can work up to 1,333MHz. Note this isn’t the real clock speed but twice that speed. So the real clock speed of DDR3-1333 is 666MHz. The yyy indicates the maximum transfer rate that the memory can reach. So memory labeled as DDR3-1333/10664 has a transfer rate of 10,664MB/s or 21,328 MB/s if they are running under dual channel mode. Most current boards have dual with the Intel socket 1336 has triple channel.

The memory timings x-x-x-x indicates the number of clock cycles that it takes for the memory to perform something. The smaller the number, the faster the memory. These set of four numerical parameters are called CL, tRCD, tRP, and tRAS. Sometimes there a fifth value which is voltage. Check out Understanding RAM Timings for more information.

Memory is sold in “kits” which are simply multiple single, similar (identical as possible) RAM modules packaged together. The intention is for them to be used in motherboards that have dual and triple (etc.) RAM channel capabilities.

Graphics Processing Unit (GPU)

I’m going to try and live with the on-board graphics processing unit (GPU) integrated with the CPU and invest that money elsewhere.   The reviews of  Intel’s newest integrated GPU that comes with the i5-3570K (HD Graphics 4000 or HD 4000) have been favorable (also see this).   This is the  third and latest generation of HD Graphics (now with 16 execution units) and appears to be a real contender to low end graphics cards.  If it proves less than acceptable, I’m invest in a graphics board another day.

Sound Card

Here again, I’m not buying a separate card but using the Intel High Definition Audio integrated into the motherboard.  Frankly, I’m not sure if this will limit my GNU Radio & digital signal processing objectives but I’ll take the risk.  If I’m unhappy for any reason, I’ll buy myself a sound board.

Solid State Drive (SSD)Samsung-SSD-840-Pro

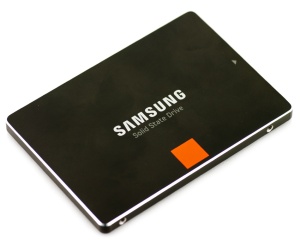
I have chosen the Samsung Electronics 840 Pro Series 2.5-Inch 128GB SATA 6GB/s for my Solid State Drive (SSD).  Samsung has a great repatriation in this space and it has gotten solid reviews.

What most people who use SSDs do (and what I plan to do) is to buy one large enough to hold the OS and applications, and also buy a hard drive to hold the rest of your documents, photos, videos, etc. That’s a good compromise which puts the most performance-critical files on the fastest drive and has the cheapest cost-per-byte for your voluminous data files which typically have much lower performance requirements.  But keep in mind that as soon as the amount of data written reaches the stated capacity of the device, the write bandwidth immediately drops.  In fact, write bandwidth reduced by up to 70-80% once fully loaded with data and continued to operate under those conditions.  Therefore, don’t fill the SSD drive.

Also, one of the most publicized downsides of SSDs is that they have a limited number of writes before they wear out—however, with most newer SSDs, this isn’t actually a problem. Most modern SSDs will become outdated before they die, and you’ll probably have upgraded by then, so there’s not really a huge need to worry about writing to the drive too many times.

Because of the high speed of the SSD, your going to want to use the 6GB/s SATA ports on the motherboard.  The standard 3GB/s SATA ports don’t have the throughput, never the less, studies show the SSD still give you benefits.

Power Supply Unit (PSU)Corsair 650W PSU

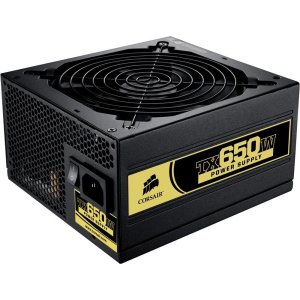
I choose the popular  Corsair TX650 650-Watt Power Supply as my PSU. Most computers only consume around 150W, and even a high end computer might consume maybe 200W. That’s why most OEM computer manufacturers put small 250-350W PSUs in their systems. If you look at online reviews of highly overclocked systems with multiple video cards (SLI/Crossfire) they consume at most about 500-600W.   I don’t believe I’ll ever approach these levels so this PSU will give me much head room.  The review I have read seem to claim that he best way to take advantage of the TX650W’s quiet qualities is  to ensure that the PSU intake air does not exceed 30°C often, nor demand more than ~350W DC output.  I believe my usage will fit in this sweat spot.

Networking

Networking capabilities are built into the motherboard.  The Mobo comes with two Gigabit (10/100/1000 Mb/s) LAN subsystems using the Intel 82579V Gigabit Ethernet Controller. It also has a Bluetooth 2.1 & WiFi 802.11b/g/n module. There appears to have been some troubles with WiFi and Bluetooth module for DZ77GA-70K in 2012, but it has been reported to Intel and hopefully this has been worked out by now.  I’ll have to make sure I update the firmware on the board when I get it.

CD-ROM / DVD Drive / Hard Drives

I’m not going to worry about this now.  I anticipate loading all my software / data from the Web or transferring from my existing hard drives.  Also, I’ll reuse my existing hard drives in this box.

Cooler

The Intel Core i5-3570K comes with a stock cooler.  If do over clock the CPU, I’m likely to need a better cooler, but this is fine for now.

CaseCooler Master HAF 912 - Mid Tower Computer Case

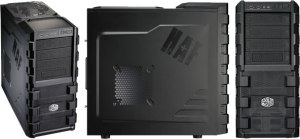
Picking a case has been the hardest thing for me to select.  I guess this is because its not as much a technical decision but an aesthetic choice.  I have narrowed my choose to the Cooler Master HAF 912 – Mid Tower Computer Case with High Airflow Design (19.5 x 9.1 x 18.9 inches ; 17.8 pounds).  It has gotten good reviews with the main complaint being that it needs more fans (much room for more installation but only two are provided).  The front panel comes with the older USB 2.0 ports but the Mobo comes with a USB 3.0 panel that could be install if desired.  The case isn’t expensive but still has a sharp look and seems very versatile in its use and cooling.

Monitor

The Dell LCD monitor I presently have dates back to 2006 and isn’t equipped with HDMI, which is the only way to interface with the Mobo.  I presently use my monitor via its Digital Video Interface Digital (DVI-D), but it also has Video Graphics Array (VGA) and Composite Video inputs.  So if I wish to continue to use the monitor, I’ll need a converter of some type.  I found that the DVI-D to HDMI can be done via an inexpensive cable, so that is the way I’m going.  I specifically need a HDMI Type A to DVI-D Dual Link Male to Male cable.

Operating System (OS)

I plan to install Ubuntu Linux on the SSD drive.  Picking the Linux distribution was nearly as hard as picking the case.  I choose Ubuntu because of its popularity and I wanted to experience its desktop environment once again, GNOME.  I used GNOME many years ago when it was very young, I saw potential, and I would like to see how it has grown. I plan to spend the vast majority of my time within Xterm at the command prompt, but I also want to get familiar with Ubuntu/GNOME.  I’ll also do most of my systems administration at the command prompt, but again, getting familiarity with Ubuntu would be good to know.

How do I plan to installing Ubuntu, given that I will not have a OS already installed and I will not have a CD-ROM/DVD?  Ubuntu does have an ability to be installed via an USB stick.

I’m not going to abandon MS Windows.  I have many tools that I use in Windows and its not practical to just abandon them for something else, at least not right now.  I would like to dual boot the system with Linux and MS Windows.  Ideally, I’ll keep my old Windows image on my current PC’s hard drive, put that drive in my new system, and have the hard drive be my second OS on the bootloader’s chain of operating systems.  I know this could be done if I choose to re-install MS Windows and all my applications but I don’t know the challenges I’ll face given I’m using an establish image …. it will be a learning opportunity!

If I’m forces to do a re-install of MS Windows, I might us Oracle VM VirtualBox, which is a x86 virtualization software package. VirtualBox can be installed on an existing host operating system as an application; this host application allows additional guest operating systems, each known as a Guest OS, to be loaded and run, each with its own virtual environment.  The typical way of installing a guest operating system is to install it from the ground up. In general, you don’t see VirtualBox running a guest operating system from an existing drive or partition.  Never the less, a search of the Web does show evidence that people have made it work this way (1, 2, 3, 4, 5, 6, 7).

The last, and least desirable approach (for my needs) is to use Windows applications is via Wine.  Wine (originally an acronym for “Wine Is Not an Emulator”) is a compatibility layer capable of running Windows applications on Linux. Instead of simulating internal Windows logic like a virtual machine or emulator, Wine translates Windows API calls into Linux calls on-the-fly, eliminating the performance and memory penalties of other methods and allowing you to cleanly integrate Windows applications into your desktop.  Since it doesn’t create a virtual machine programs perform faster than in a VM.  However, you’ll need to test it with your application since it doesn’t support all programs.  Also, you’re not running MS Windows, just the MS Windows compatible applications.  This is fine if your interest in running Excel standalone, but you can’t perform anything that requires the MS operating system.

Boot Loader

A boot loader is the first software program that runs when a computer starts. It is responsible for loading and transferring control to the operating system kernel software. The kernel, in turn, initializes the rest of the operating system.  GRUB (GRand Unified Bootloader) is a boot loader package developed to support multiple operating systems and allow the user to select among them during boot-up.  GRUB is often the default boot loader for Linux and is preferred to MS Windows since it makes up for numerous deficiencies while providing full-featured command line and graphical interfaces.  GRUB is the default boot loader for Ubuntu, making it an easy choose.  GRUB is powerful and complex so check out How I configured grub as the default bootloader on a UEFI Boot systems.

What does it Cost

Now that I have a plan, what will all this cost?  I estimate it will be $765, less than one-third the cost of my present system.  Granted I’ll be reusing the monitor, key board, mouse, and some drives but this is a substantial price difference for what will be a much more capable machine.

cost

To see what I finally implemented, check out Building My Linux Box…The Implementation.

A Better Mobile Display for the Raspberry Pi

As I described in an earlier post, I run my Raspberry Pi (RPi) as a headless system, using Cygwin/X‘s xterm for command line interaction with the RPi, with my PC being my X server to support any X Window applications.  I can move files between the PC and the RPi via my pseudo-Dropbox.  I really recommend this configuration and its working perfectly for … Continue reading

Blog Stats

  • 634,673 hits

Join 58 other subscribers

Jeff’s Skinner Box Gravatar